Thursday, December 18, 2014

Winter Wonderland Starburst

Hey Everyone,

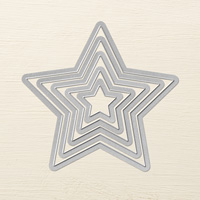
Today's card I used the starburst technique along with the deco framelits. I love the background and how I was able to use the scraps from my All is Calm designer series paper. The fancy fan embossing folder was the perfect background base that I didn't think took away from my starburst background. I wanted that to be the focal point of my card.

I cut different sizes of the framelits and layered them. The sentiment is from the wondrous wreath stamp set. I think this is one my favorite cards I have done. Thanks for stopping by and I hope you enjoyed my card.


Twinkle Twinkle little star...

I have a Christmas card for you guys today. I have been swamped with life but that doesn't mean I haven't been crafting! I have lots to share and the first thing I am showing off is this star christmas card I made. I saw something similar on pinterest and this is what came of it. I hope you enjoy this card. Thanks for stopping by.


Saturday, November 15, 2014

Christmas Candy Treats

Hey Everyone!
 
Happy Saturday! I have a cute little project to share with you guys today. I've seen these on Pinterest and knew I needed to make them! Christmas is right around the corner. It's time to start those Christmas cards and get those treats ready for your kids classrooms or co-workers. Today I have a really easy project and instructions on how I made it!
                                         
 
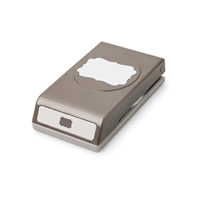
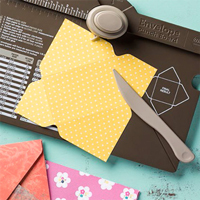
This little treat I made using the envelope punch board (I love that thing) for a Holiday Boutique I am participating in next weekend. They are small enough to hold a mini size piece of candy but big enough to slide my business card in! They are just perfect I think! I will be handing these out at my table next weekend!
 
Ok so now for instructions. I have seen some make theirs with 5 x 5 or 5 1/2 x 51/2. For what I wanted I needed something a little smaller. I was able to figure out the dimensions to use 4 1/2 x 4 1/2 piece of paper. Line up your paper to the 2 5/8 mark on your punch board. Score and punch. The rotate your paper and line up the score line. It should line up at 1 7/8. Score and Punch again. Do this for the next two side until your paper looks like below. After you have all of your sides scored and punched, just fold along the lines and secure with adhesive.


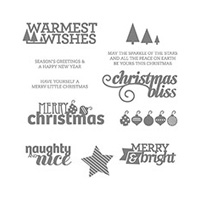
I punched out two tags. One with the decorative label punch and the scalloped oval punch. I stamped merry and bright sentiment from Christmas bliss and punched out with the large oval punch (1 3/4 x 7/8). Put all the labels together and your cute little treat is complete! This is a perfect project to make with the paper stacks or with scraps you have from left over DSP. I hope you enjoyed this little project and inspires you to start making your holiday treats!


Remember you can order online 24/7 at www.stamptime.stampinup.net
 
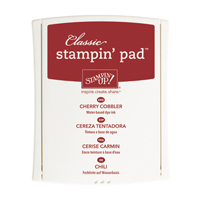
Here are the list of products I used:
 
Table by StampinBuddy. Try it FREE.                                                   Happy Crafting!!
                                                                                                                         Priscilla

Thursday, November 6, 2014

Be Grateful....be thankful

Hey Everyone!
 
Well the holidays are upon us and there is no turning back now. I have been busy crafting and have lots to share. Today I am going to start off with goodies for Thanksgiving to show a special someone you care. Today I have a wine tag on the blog today and a Thank you card. I love the two tone effect on the card. The card is matted twice and stamped with dotty angles and the seasonally scattered stamp set. I love that stamp set. Plus I just received my feathers and had to use them! I am so excited for them.  
                                                                                                                                                                                                                                           
CARD RECIPE
Dotty Angles
Seasonally Scattered
Four Feathers
Feather Framelits
Whisper White Cardstock
Blackberry Bliss Cardstock
Blackberry Bliss Ink
Hello Honey Ink
WINE TAG
Blackberry Bliss
Merry Everything
Note Tag Punch
Hello Honey
Bakers Twine
Champagne Glitter Paper
Gold Soiree DSP

Well I hope you enjoyed my two projects! As always thank you for visiting and happy crafting!
 
Priscilla


Saturday, October 18, 2014

Happy Bosses Day!!!

Hey Everyone!!

Hope everyone has been enjoying their October and getting ready for Halloween! I have been super busy and still crafting away...just haven't had time to post. So Bosses Day was this week so I made my manager a card and all of us supervisors signed it. It was easy to put together but still has a lot of details. I love dry embossing and I am so in love with Stampin' Up's glitter paper. I listed the card details below. I hope you all have a fantastic Saturday. Happy Crafting ~ Priscilla  


CARD RECIPE

Saturday, October 4, 2014

Starz Boo

Hey Everyone!! 

Welcome to the Jacksonville Starz Halloween Blog Hop! I am so glad you are joining us today and hopping along our blog with us. For this month I decided to do something different besides a card. I love Halloween! It's probably my most favorite holiday to decorate beside Christmas. The focal point in my house is my mantle. So I decided to make some Halloween blocks. This meant a trip to Home Depot first. I bought a 4x4 wood post and the nice guy cut it into 10 blocks for me. I had him cut them to 4x4 blocks. (I am saving the other blocks for Christmas). 


I sanded each side of the blocks to make them smooth. I then painted them with black paint. I let them dry for a little bit. While they dried I cut my paper to size. The faces and tops of the blocks are 3 3/4 x3 3/4 and the sides are 3 1/4 x 3 1/4. I only had to use two sheets of DSP and I still had some left over. I decided to use Witches Brew because it goes better with the decor of my house. Witches Brew is still on sale in the clearance section…it's a steal at $4.39. 

To apply the paper you need mod podge. Take a paint brush (use a cheap one) and apply a thin layer of mod podge on one side of the block. Next take your DSP and apply a thin layer of mod podge to the back of the paper and press it against the block. Then brush a thin layer of mod podge over the entire paper and the side of the block. You will see a thin white film of mod podge. That's ok because it will dry clear. Repeat until you have all the sides covered. 

The rosettes are made with the Rosettes Designer Bigz XL Die. I cut my paper to 1 1/2 inches by 11 to make my rosettes smaller. The stamp set is the Bite Met Photopolymer Stamp Set. This is my absolute favorite halloween set. 


The spider web is amazing and so large. I cut the mini spider out by hand and the orange splatter is also from the bite me set. The little black dots are from the gorgeous grunge set.  


PROJECT DETAILS 


Well I hope you enjoyed my project. I had fun making it and sharing it with you guys. Please visit my online store at stamptime.stampinup.net I hope you decide to become of follower of my blog. I will be making a Halloween banner and posting pics of my mantle once it's complete! Now hop along now and check out my friend Maria's blog! She is amazingly creative and nice! 
                                                                     Maria Willis 
http://cardbomb.blogspot.com/2014/10/jacksonville-starz-halloween-blog-hop.html

If you get lost along the way here is the whole blog roll list: 

Happy Crafting!! 
Priscilla